

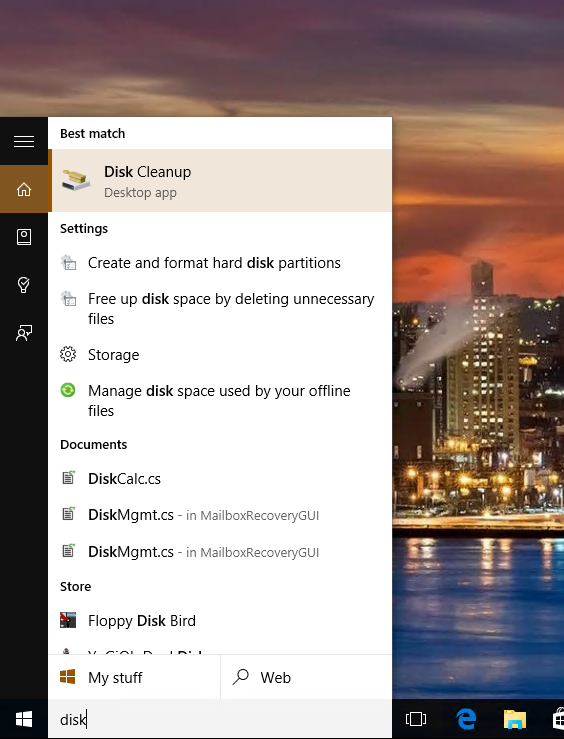
 It’s amazing the amount of stuff on a hard drive that can be overlooked, until you run out of space. The Disk Cleanup tool that is built into Windows can help keep your machine extra tidy, but can also be a powerful tool when you’re in a space crunch.
Think of the Disk Cleanup tool’s basic functionality as a “squeegee”. But it has a mode that deals with system level files and more important stuff; think of that as the “power washer”.
In “power washer” mode, I was able to free up almost an additional 29GB of disk space. A lot of this was due in part to the recent upgrade to Windows 10 that was performed on this machine. And there’s more to be saved too. More on that later.
I’ll walk you through the basics of how to use the Disk Cleanup tool. It’s pretty powerful, so if you’re worried that you might inadvertently clean up something that you shouldn’t have, make sure you backup your data first.
Disk Cleanup for beginners
In it’s simplest form, Disk Cleanup will help with taking care of some of the basic areas where disk space can become cluttered. This includes setup logs, temp files, temporary Internet files, offline webpages, the recycle bin, and a few other Windows-related type files. After a while, some of these areas can consume quite a bit of space particularly the web pages that are cached, or the temporary Internet files.

As you review the list of areas that have potential files to delete, you can check the box next to each area. As you go through the list and mark off the areas to cleanup, you’ll see the “Total amount of disk space you gain” increase or decrease. Once you have checked all the areas you want to clean up, simply click the OK button which will start the cleanup process.
I want more … what about “power washer” mode?
I mentioned earlier that Disk Cleanup has the ability to deal with more advanced cleanup operations, like those of system files. When you first launch Disk Cleanup, notice the “Clean up system files” at the bottom of the window. Click that, and you’ll see some additional areas which you can select for cleanup.
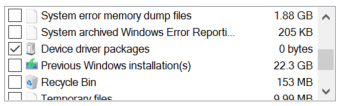

See some big space consumers? How about previous Windows installation(s) and temporary Windows installation files? Those are some big hitters that you may or may not need.
For me, I had recently upgraded from Windows 8 to Windows 10. With that upgrade, it leaves behind your previous Windows installation in case you decide that you want to “roll back”. But, if you’re off and running Windows 10, and there’s no looking back, this is an easy way to reclaim some of your precious hard drive space.
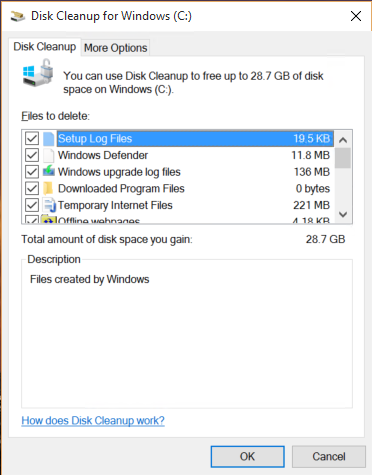
I went through the list, and as you can see, I had the opportunity to reclaim quite a bit of space. I selected everything, and that equaled 28.7GB of space I would gain; I clicked OK.
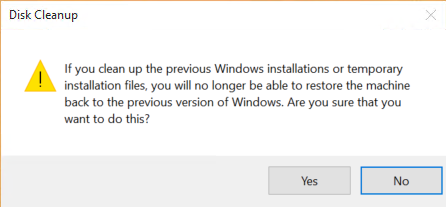
Because I had selected to remove the previous Windows installation files, it confirmed with me that I really wanted to do that.
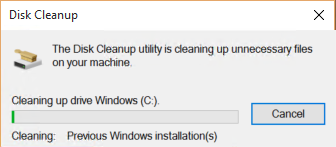
The cleanup took about five minutes or so…
But when I was done, you can see the results:
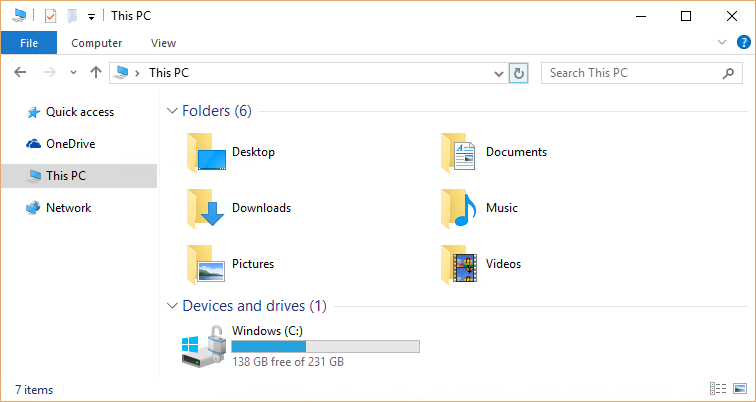
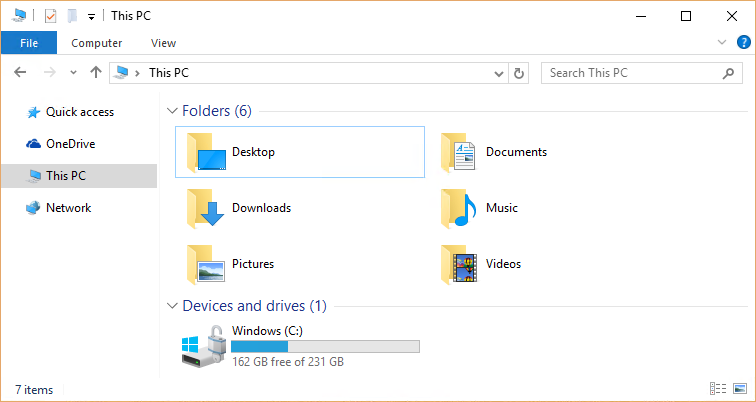
Not too shabby!
Final thoughts
Disk Cleanup is installed with Windows, including all the way back to Windows XP. If you aren’t sure where to locate it, you can use Windows Help to figure how out to access it in the version of Windows that you are running.
For users who have upgraded from Windows 8, you have an additional opportunity to recover even more space by eliminating the recovery partition that was created by the Windows 8 installation, or by your PC vendor. If you’re interested in learning more about removing the recovery partition, which can get you another 4GB-6GB of space, check out this article.